Using Neon branching for instant Point in time recovery
Recover your data to previous state using Neon's branching feature

In this guide, you’ll learn how to leverage Neon branching to programmatically restore your data to a previous state.
What’s Neon?
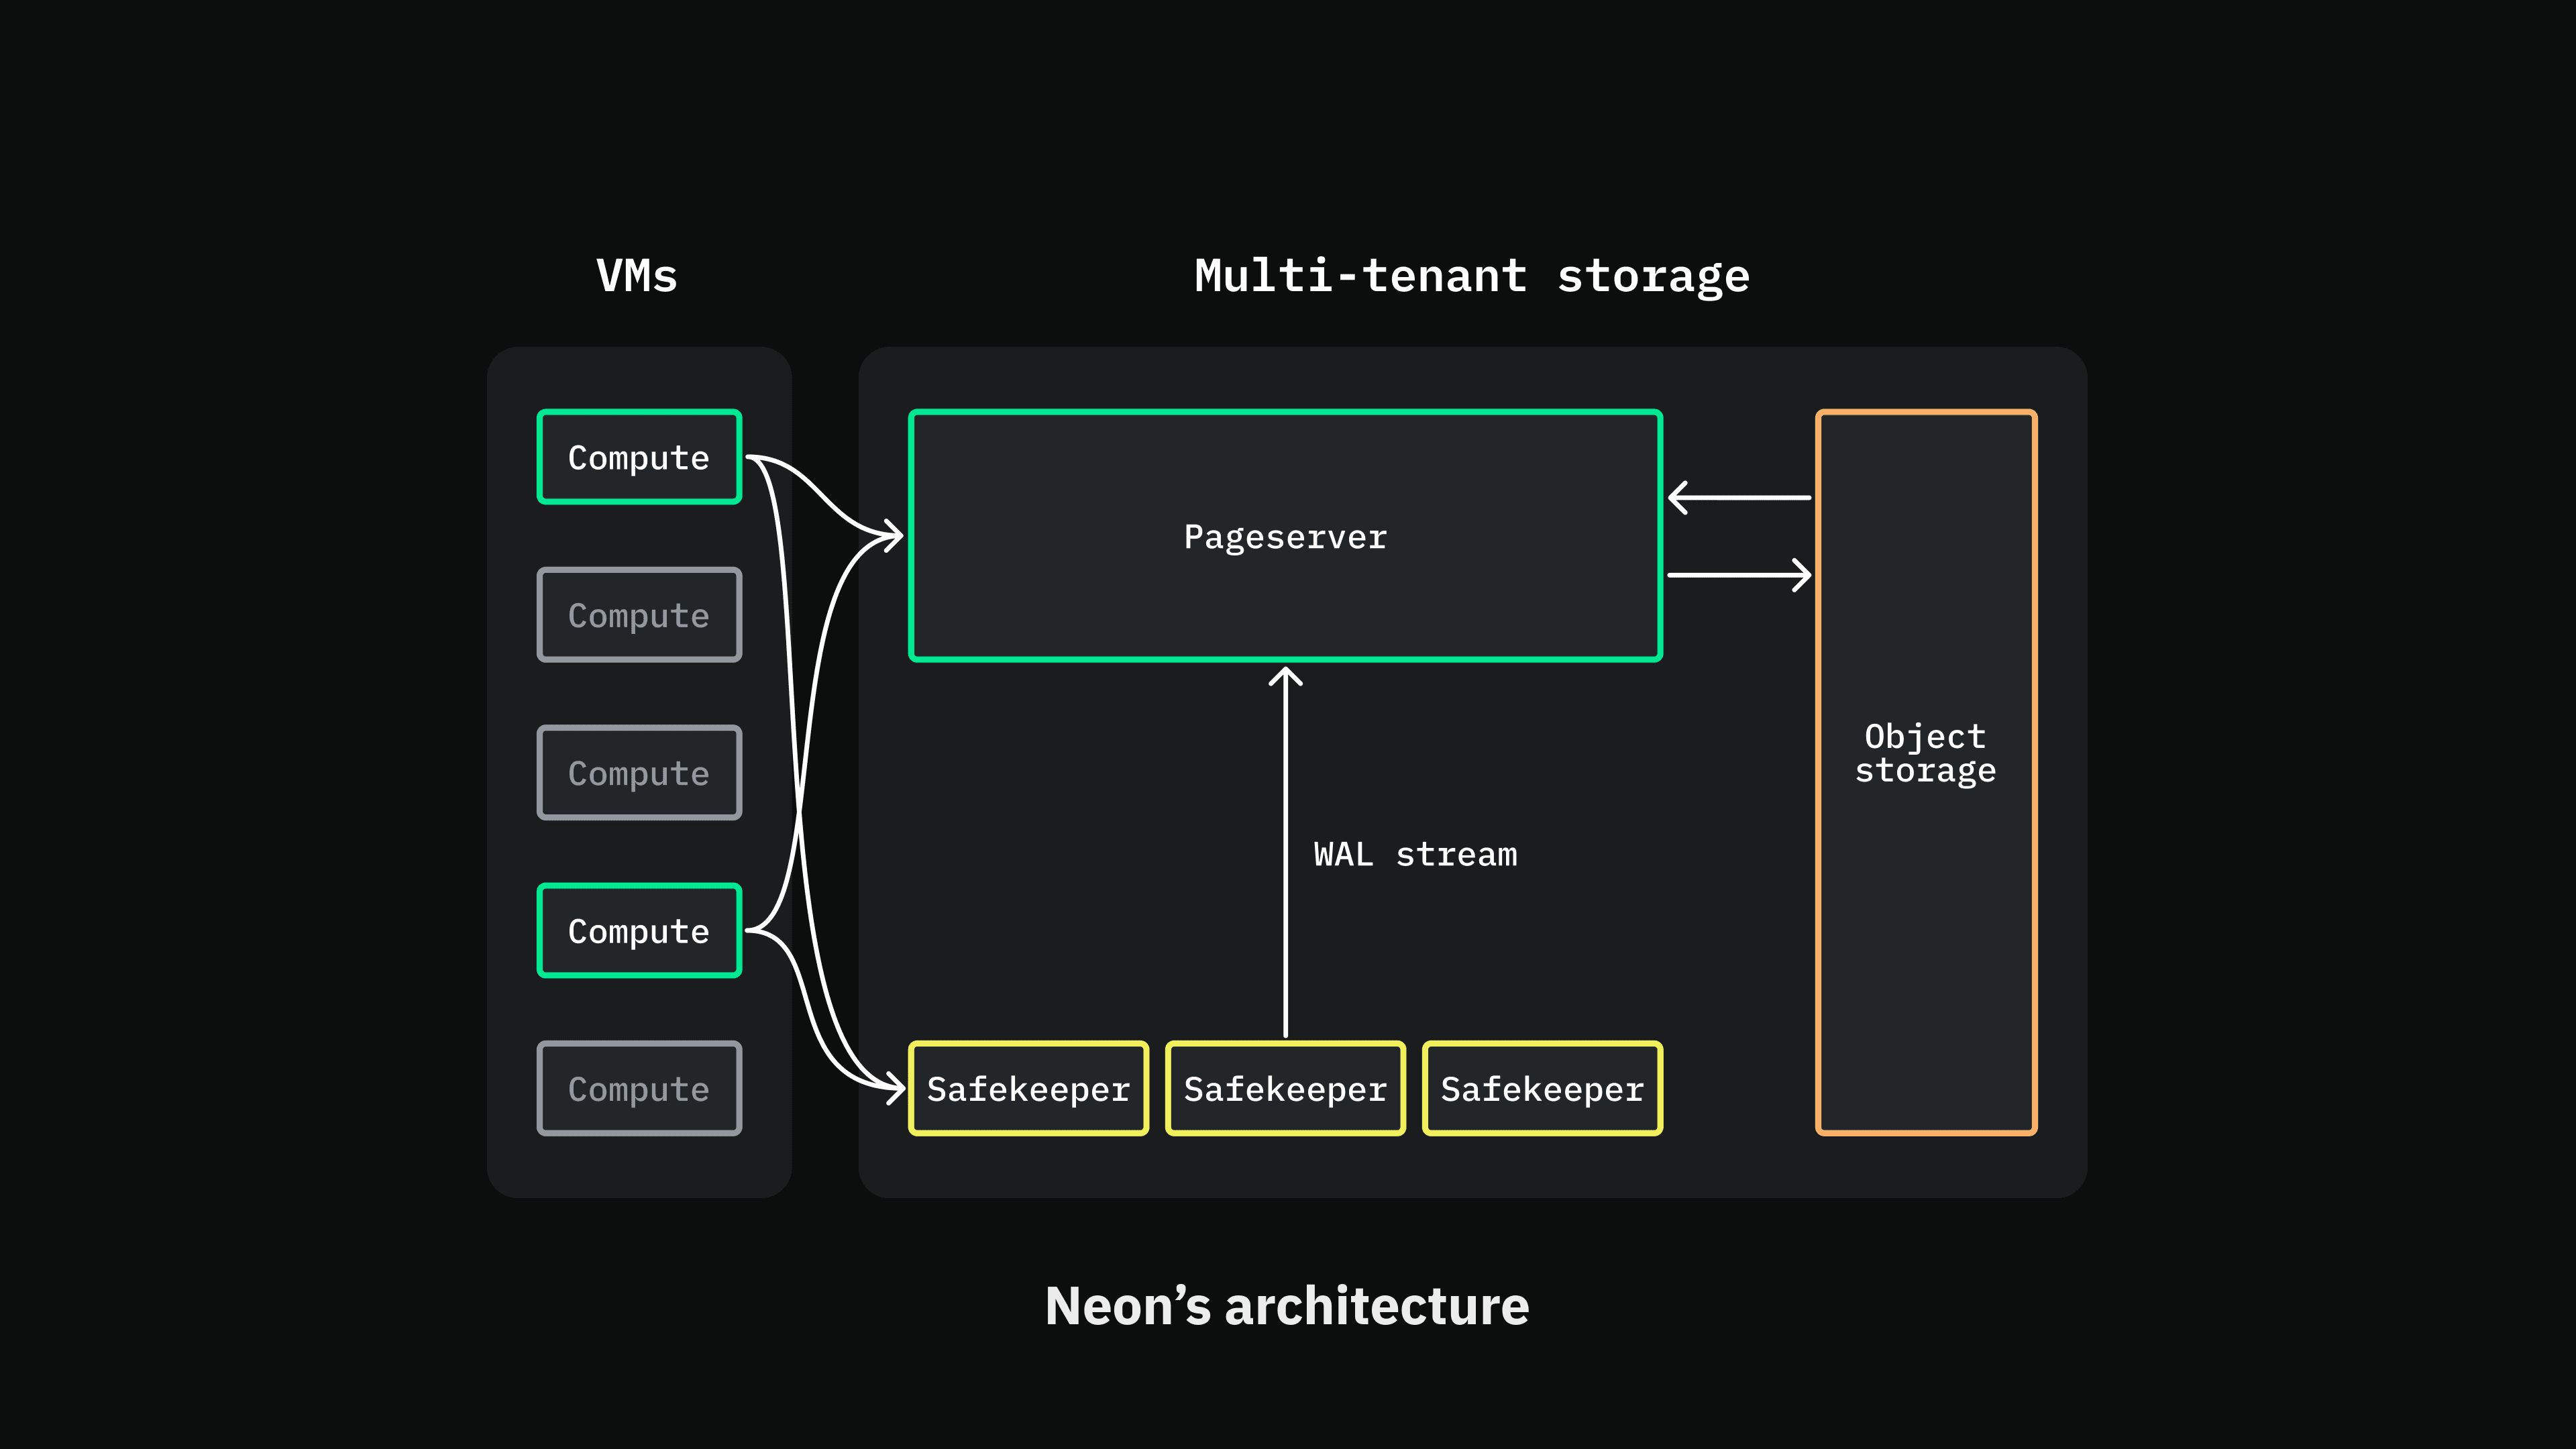
Neon is a fully managed serverless Postgres. This means you do not have to pick a size for your database upfront, and it will automatically allocate resources to meet your database’s workload. This is possible because Neon’s architecture separates storage and compute.

What’s Neon branching?
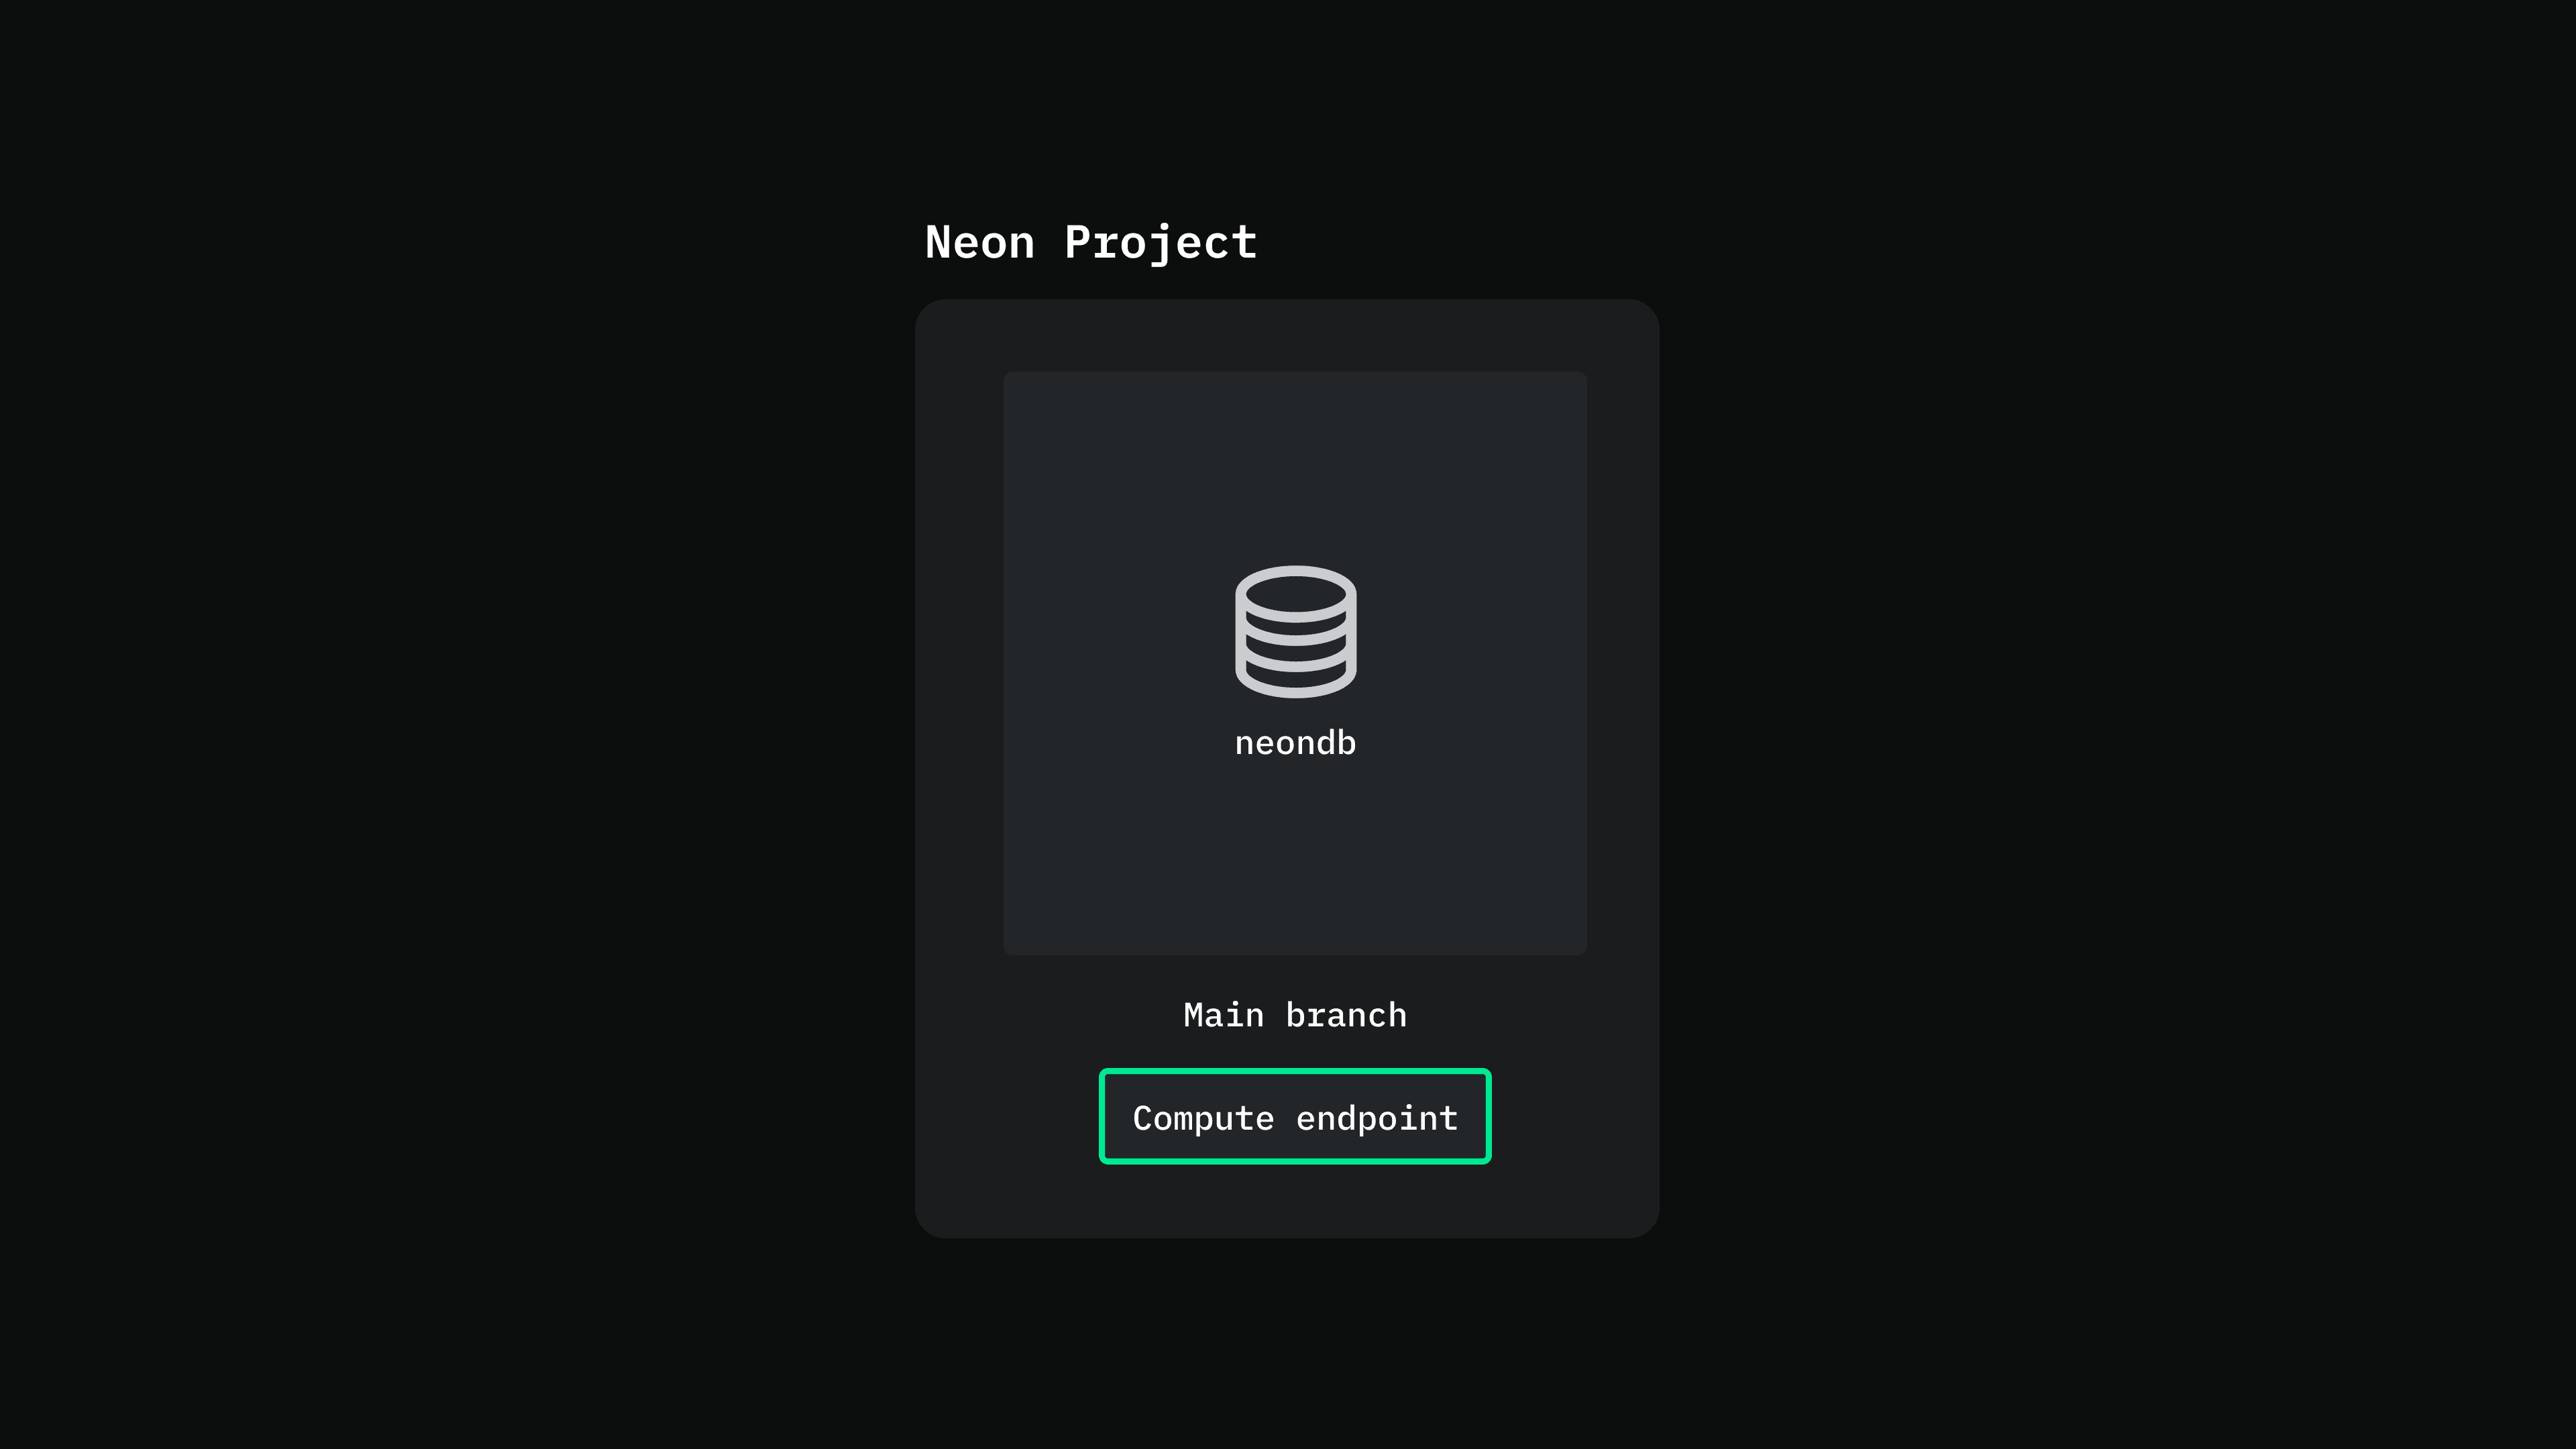
When you create a project in Neon, a default Postgres cluster is created along with a default database called “neondb”. Under the hood, this Postgres cluster is represented by a ” main ” branch.

Similar to how you work with code, Neon enables you to create copies of your Postgres cluster, where each copy is completely isolated from the other. We refer to this copying process as “branching”, and call each copy a “branch”. Branches are created using copy-on-write, making it a fast and cost-effective process.
You can specify which data you want to include when creating a branch:
- Include all data up to the point of branch creation.
- Include data up to a specific point. You can specify either:
- Date and time
- LSN (Log Sequence Number, a byte offset to a location in the WAL stream.)
Creating a branch and including data up to a certain point enables you to implement a backup strategy to restore your data to a previous state.
Create a branch from a point in time
Neon retains a data history in the form of Write-Ahead-Log (WAL) records, allowing you to restore data to a previous point in time.
The data history window is seven days by default, but we plan to make it configurable in the future.
You can use the Neon CLI or the console to create a branch from a point in time.
To do it from the Neon console:
- From the sidebar, select “Branches”
- Click “New branch”
- Choose the “Time” option, then select the date and time
- Choose “Create compute endpoint”
- Click “Create branch”
If you chose a point in time that falls within your data history window, a new branch will be created, containing both the schema and data up to the point in time you specified.
Restore the branch to a previous state while keeping the same compute endpoint
While the previous approach works, you must change your application’s connection string because you have a new compute endpoint with the newly created branch.
We’re currently in the process of implementing automated backups in Neon, and this is something we’re taking into account.
In the meantime, you can use the Neon API to restore a branch to a previous state while keeping the same connection string.
Here’s a high-level overview of how it can be done:
- Create a branch without a compute endpoint from a previous point in time.
- Assign the compute endpoint you want to use to that newly created branch.
- Set the new branch as the primary branch. (This ensures that access to data is never interrupted since the primary branch has no limit on Active time.)
Here’s an example script using TypeScript. It’s available on GitHub, along with setup and usage instructions.
import { createApiClient } from '@neondatabase/api-client';

const NEON_API_KEY = '';
const NEON_PROJECT_ID = '';
const ENDPOINT_ID = '';
const TIMESTAMP = '2023-07-23T14:05:53.000Z';

const main = async () => {
  try {
    const neon = createApiClient({
      apiKey: NEON_API_KEY,
    });

    // create a new branch without an endpoint
    const newBranch = await neon.createProjectBranch(NEON_PROJECT_ID, {
      branch: {
        parent_timestamp: TIMESTAMP,
      },
    });

    const branchId = newBranch.data.branch.id;

    // update endpoint to point to the new branch
    await neon.updateProjectEndpoint(NEON_PROJECT_ID, ENDPOINT_ID, {
      endpoint: { branch_id: branchId },
    });

    // set the new branch as the primary branch
    await neon.setPrimaryProjectBranch(NEON_PROJECT_ID, branchId);

    console.log('Branch restored successfully!');
  } catch (error) {
    console.log('Something went wrong', error);
  }
};
main();
After cloning the project and installing the dependencies, you will need to modify the script to include the following:
- A Neon API key – you can generate one by going to account settings > developer settings > generate new API key.
- Your Neon project ID – you can find it in your project settings.
- The ID of the branch containing the compute endpoint you want to keep – you can find it by navigating to “Branches” and selecting the branch from the list.
- A timestamp in the ISO 8601 format (you can use this timestamp converter )
When you run npm start, the script calls the main() function, which uses the official Neon TypeScript SDK to do the following:
- Creates a new branch in the specified project using the provided timestamp as the parent.
- Updates the specified endpoint to point to the newly created branch. The branch ID is included in the request body.
- Sets the newly created branch as the primary branch for the project.
Deleting the old branch’s data
Since you won’t be using the old branch anymore, we recommend that you do the following:
- Rename the old branch so you don’t accidentally reuse it (e.g., “old_branch_do_not_use”) since deleting the root branch of your project or any branch with children is currently not possible.
- Delete data in the old branch so you don’t get charged for storing unused data. (If you’re on the Pro tier)
Conclusion
In this guide, you learned how to use Neon’s branching feature to restore your data to a previous state. You can check out more ways to leverage branching in your workflow.
Also, if you’re new to Neon, you can sign up for free.


